Plunger Coffee brewing guide – French Press
Table of Contents
How to make the perfect Plunger coffee
Often referred too as “French Press” which I guess does sound a bit more sophisticated. Plunger coffee made at home is very easy, especially if you need to make coffee for a number of people. Mainly because once you have nailed the technique for 1 or two cups you just scale the amount to match the number of people you are making coffee for. oh yeah and gradually purchase bigger and bigger plungers as more and more people hear how good your coffee is:-)
So what about the taste isn’t this just another way to brew your coffee that just ends up with the same result as something like pour-over or drip coffee machines. Well yes and definitely no… if you have got a fresh, good quality coffee bean or grounds the coffee is immersed in the water for a much longer time than the pour-over type methods. This, in turn, creates a fuller-bodied (almost thicker) coffee drink which is preferred by many people, especially those that like to add a splash of milk to their drink.
Equipment Required
- Plunger (French Press)
- Coffee Beans (19-20g)
- Grinder with a coarse setting
- Scales or a good ability to estimate or willingness to experiment
- Kettle
- Water – 300ml
Before you start the brewing process
Just a quick note before you start, think of these steps as a starting point, the beauty of coffee and brewing your own is that you can make it so just how you like it, unfortunately at this stage, you might not know how you like it yet or the coffee you using may require a slight tweak to the process, so take these steps and keep experimenting. Find out what happens to the taste when you change the amount of coffee, grind the coffee finer or grind it coarser(if that’s even a word).
Also, make sure you know upfront where to fill the plunger to or just boil the required amount of water
Preparation steps for plunger coffee

Step 1 – Grind the coffee
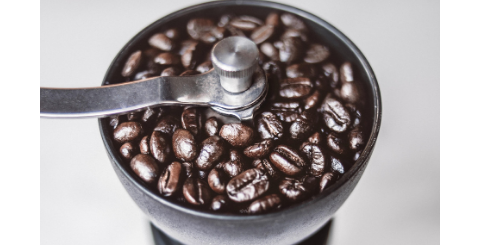
The first step is to grind your coffee beans, the standard quantity seems to be about 19g to 20g but if you don’t have any scales then grind until you have about 4 tablespoons worth of ground coffee. Note it needs to be on a coarse ground setting .
You can still produce excellent coffee even if you are not grinding your own, just make sure it’s fresh good quality coffee to get the best taste. Keep in mind though that you only need a coarse grind for this so you can actually get excellent results from an inexpensive manual grinder. Grinding not only allows you to optimize the flavor from your coffee beans but also keeps the flavor locked for longer, weeks instead of days. It really can make a massive difference especially if you are using good quality coffee.
Step 2 – Add the coffee to the coffee plunger
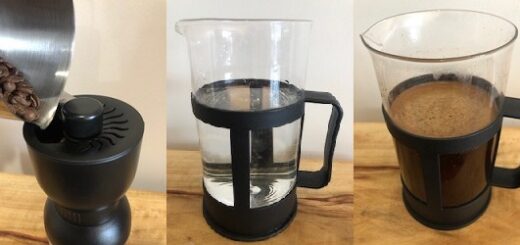
Now simply add your ground coffee beans (ideally freshly coarse ground) to the coffee plunger

Step 3 – Boil and add water to the plunger
Next, you need to boil the water and vigorously pour over the coffee within the plunger.
Step 4 – Stir the water and coffee grounds
Now simply stir the water and coffee in the plunger / french press so that all the grounds are mixed well.
Step 5 – Let the plunger coffee brew
Now wait 3 minutes and 39 seconds, it’s all about that 9 seconds:-) On a serious note, there is a bit of variation here depending on your taste and coffee used. A longer time will result in a stronger taste whereas a shorter time may offer more fruity/floral notes, but 3 to 4 minutes is the recommended sweet spot. Another technique is to stir for longer and then plunge straight away!
Step 6 – Plunge the coffee
Now its time to plunge the plunger, although you can first remove the layer of foam and grounds left at the top. Once you have done this replace the lid and apply gentle pressure to the plunger. It should be a firm pressure but not offer excessive resistance that it’s too hard to push. If it does, try releasing and re-applying the pressure. If you still get a high level of resistance the coffee grounds you are using may be too small.
Once the plunger reaches the bottom pour immediately directly into your cups or a second serving jug. If you leave it in the plunger it will continue to brew and extract more flavor from the coffee and by the time you come for your second cup, it might be a lot stronger.
My plunger coffee is too strong what can I do?
If your coffee is too strong there are a number of things you can try:
- Use a coarser ground coffee
- Leave the coffee to brew for a shorter time
- Add less coffee or more water
My plunger coffee is not strong enough!
If your coffee is on the weak side you can try doing the following to improve the taste, basically the opposite of if the coffee was too strong
- Use a finer ground coffee
- Leave the coffee to brew for a longer time
- Add more coffee or less water
My coffee does not taste good!
If you have experimented with everything, the first thing I would do is try a different coffee bean, this can make a massive difference to the final result as not all beans taste the same and not all are suited to this brewing method.
Why is the plunger too hard to press?
You should get a nice level of resistance but if it’s too hard it could indicate that the coffee ground size is too fine, try a more coarse setting on your grinder. See here for more information about grind setting.
Altering the quantities for your plunger
For larger plungers, 300ml is probably quite a small amount of water so you might need to double or triple the coffee and water amounts. A good tip is to work out how much water you are going to use and mark the plunger, or find a point on your plunger and calculate how much water that is. 600ml is probably a good amount for many plungers and you can simply double the quantities above.
For example when putting 300ml in my plunger it looks a little empty, it will do the job if your only wanting a small amount of coffee

But when I double the water to 600ml it comes exactly to the top of the plastic part of the handle making it easy to see the fill point. And I hust double the coffee amount used to 38-40g.


